Eventuri Audi B8 RS5/RS4 Carbon Intake EVE-RS5-INT
2.934,25€ VAT incl.
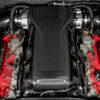
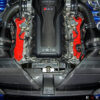
The Eventuri Audi B8 RS5/RS4 Carbon Intake EVE-RS5-INT is a high-performance upgrade designed to maximize airflow efficiency and power output. Made from 100% prepreg carbon fiber, it replaces the restrictive stock airbox, improving throttle response, turbo efficiency, and engine sound. You can read more about the housing design and how it works HERE.
We suggest that you ask for the exact delivery cost and time.
Eventuri Audi B8 RS5/RS4 Carbon Intake EVE-RS5-INT – Precision Engineering for Maximum Performance
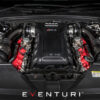
The Eventuri Audi B8 RS5/RS4 Carbon Intake EVE-RS5-INT is designed to transform your engine’s breathing, delivering significant power gains and improved throttle response. By replacing the restrictive stock airbox with a fully enclosed carbon fiber system, this intake optimizes airflow to the throttle bodies, ensuring that your RS5 or RS4 performs at its peak. With an innovative venturi housing, smooth intake ducts, and optimized scoops, this system enhances both efficiency and aesthetics in the engine bay.
Dyno-Proven Performance Gains of Eventuri Audi B8 RS5/RS4 Carbon Intake EVE-RS5-INT
Independent testing shows that the Eventuri Intake System outperforms the stock airbox in both power and torque:
- RS5 Dyno Results: Gains of 15-20hp and 12-18ft-lb at the wheels, with significant improvements across the RPM range.
- RS4 Dyno Results: Increases of 25hp and 25ft-lb in mid-range torque, translating to faster acceleration.
- On-Road Testing: A reduction in 60-130mph acceleration times due to enhanced airflow efficiency.
Innovative Carbon Fiber Intake Housing
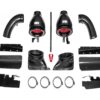
Unlike traditional open filters that suffer from heat soak, the Eventuri Carbon Fiber Venturi Housing creates a controlled and sealed airflow path. The intake system includes:
- High-Flow Double Cone Air Filters for maximum air volume and filtration.
- Carbon Fiber Venturi Housings that maintain smooth, laminar flow for faster turbo spool.
- CNC-Machined Aluminum Cowls to provide a consistent air velocity into the intake tubes.
- Prepreg Carbon Fiber Construction that ensures durability and heat resistance.
This design minimizes turbulence and maintains high-velocity airflow, improving the response and efficiency of the throttle bodies.
Enhanced Airflow with Carbon Fiber Ducts and Scoops
The carbon fiber intake ducts channel cold ambient air from the scoops to the filter housings, ensuring low intake temperatures. These ducts integrate seamlessly with the OEM air ducting system while offering:
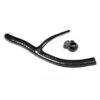
- Flexible Rubber Seals to ensure airtight connections while allowing for engine movement.
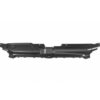
- Precision-Engineered Carbon Fiber Scoops that extend into the front grille, directing ambient air efficiently to the filters.
The result is a continuous flow of fresh, cold air that helps maintain optimal intake temperatures, preventing heat soak and sustaining performance under high loads.
High-Quality Carbon Fiber Intake Tubes
The Eventuri Intake Tubes are crafted from 100% prepreg carbon fiber, ensuring strength, lightweight construction, and heat insulation. The integrated aluminum breather tube insert ensures proper ventilation while maintaining a seamless and smooth airflow transition to the throttle bodies. The curved intake geometry is optimized to reduce turbulence while maximizing flow efficiency.
Heat Management with Laser-Cut Heat Shields
To further improve efficiency, the Eventuri Intake System includes laser-cut stainless steel heat shields, lined with gold reflective material. These shields:
- Reduce heat soak from the exhaust manifolds.
- Provide a strong mounting structure for the intake housings.
- Maintain lower intake air temperatures, ensuring consistent performance.
This results in cooler and denser air entering the engine, leading to stronger combustion and higher power output.
Development and Testing Process
The RS5/RS4 Eventuri Intake was developed over months of R&D, with every design decision focused on maximizing efficiency. Using CFD analysis and real-world testing, the engineers at Eventuri refined each component to optimize:
- Airflow velocity and pressure balance to minimize drag.
- Temperature insulation with carbon fiber and heat shields.
- Structural integrity using CNC-machined brackets and high-quality materials.
Each carbon fiber piece was carefully designed and tested to ensure seamless integration with the engine bay, enhancing both performance and aesthetics.
Why Choose the Eventuri Audi B8 RS5/RS4 Carbon Intake EVE-RS5-INT?
- Proven power gains of 15-20hp and 12-18ft-lb at the wheels.
- Innovative Venturi housing for smooth, laminar airflow.
- 100% prepreg carbon fiber construction for strength and heat resistance.
- Direct OEM replacement with no modifications required.
- Comprehensive intake system with scoops, ducts, and heat shields.
For Audi RS5 and RS4 owners seeking maximum performance, improved throttle response, and a premium carbon fiber engine bay look, the Eventuri Intake System is the ultimate upgrade.
Eventuri Audi B8 RS5/RS4 Carbon Intake EVE-RS5-INT Installation Guide
Please download the guide here.
Download Installation Guide
More from Eventuri
| Product manufacturer | EVENTURI |
|---|---|
| Brand | Air Intake |
| Car brand | AUDI |
| Eventuri Car Model | B8 RS4 / RS5 |
| Eventuri Filter Type | S |
Only logged in customers who have purchased this product may leave a review.







 Croatian
 Czech
Czech Danish
 Dutch
Dutch English
 Estonian
 Finnish
 French
 German
 Greek
Greek Hungarian
 Italian
 Latvian
 Lithuanian
 Luxembourgish
 Norwegian
 Polish
 Portuguese
 Romanian
 Russian
 Serbian
 Slovak
 Slovenian
 Spanish
 Swedish
Reviews
There are no reviews yet.